Oct 28, 2017

STRING_SPLIT function in SQL Server

STRING_SPLIT function is an in-built table valued introduced in SQL Server 2016. The purpose of the function is to split a delimited value into multiple values based on delimiter and display result in Tabular Form.

In earlier versions, we have to create our own user defined split function for the same.
Refer this post for earlier version :  Split Function in SQL

Syntax
STRING_SPLIT (string, separator)

STRING_SPLIT Function takes two parameters
  • String as Delimited Value: The delimited string value of any character type to be split in multiple values. 
  • Delimiter/Separator: The single character delimiter like comma, colon, semicolon, pipe etc. on the basis of which delimited value to be split.
Return Type
Returns a single-column table with column name as value.

Let's take an example to split a comma delimited value into multiple values on the basis of delimiter (comma) using STRING_SPLIT function.

SELECT * FROM dbo.string_split('val1,val2,val3', ',')

Now let's take another example where we have multiple delimited value stored in a table against an ID and each value needs to split on the basis of delimiter.

We will use Cross Apply clause in the example.

DECLARE @TAB TABLE(
    id int, list varchar(100)
)
INSERT INTO @TAB
SELECT 1, 'apple;banana;grapes;orange'
UNION ALL SELECT 2, 'potato;onion;carrot;brinjal'
SELECT * FROM @TAB
SELECT    t.id, s.value as val
FROM    @TAB t
CROSS APPLY dbo.string_split(t.list, ';') s

Jul 5, 2016

Map Json to Class C# using Json.Net

In this post, I am sharing how to use Json.Net to map Json response with class in C#.

Json.Net is a popular high-performance JSON framework for .NET

Prerequisite:

Json.Net : Install with Nuget Package Manager in Microsoft Visual Studio

Example 1: Using JsonConvert.DeserializeObject Method to map Json response with class

One way is to use JsonConvert.DeserializeObject Method which automatically map the data from valid Json response to class. However, in this case the structure and hierarchy of the classes must match with the Json response. You can use JSON C# class generator tools online where you have to pass Json response and it will generate C# classes for you.

Let's assume we have below Json Response
{
  "response": {
    "status": 1,
    "httpStatus": 200,
    "products": [
      {
        "id": "1",
        "name": "Product-1",
        "price": "100",
        "image_url": "~/Images/prod1.jpg"
      },
      {
        "id": "2",
        "name": "Prod1",
        "price": "200",
        "image_url": "~/Images/prod2.jpg"
      }
    ],
    "errors": [],
    "errorMessage": null
  }
}

Now let's generate classes using one of the tools online JSON C# Class Generator Tool
We get below classes for our above Json response.

public class Product
{
    public string id { get; set; }
    public string name { get; set; }
    public string price { get; set; }
    public string image_url { get; set; }
}

public class Response
{
    public int status { get; set; }
    public int httpStatus { get; set; }
    public IList<product&gt products { get; set; }
}

public class Example
{
    public Response response { get; set; }
}

Now we have classes mapped with Json response. Now use below code to map the data from Json response to classes.

static void Main(string[] args)
{
    List<Product> products = new List<Product>();
    Example res = new Example();
    res = getResponse();
    foreach (Product p in res.response.products)
    {
        Console.WriteLine(string.Format("Product Id: {0}", p.id));
        Console.WriteLine(string.Format("Product Name: {0}", p.name));
        Console.WriteLine(string.Format("Product Price: {0}", p.price));
        Console.WriteLine(string.Format("Product Image URL: {0}\n", p.image_url));
    }
    Console.Read();
}

public static Example getResponse()
{                                 
    string json = @"{
                        ""response"": {
                        ""status"": 1,
                        ""httpStatus"": 200,
                        ""products"": [
                            {
                            ""id"": ""1"",
                            ""name"": ""Product-1"",
                            ""price"": ""100"",
                            ""image_url"": ""~/Images/prod1.jpg""
                            },
                            {
                            ""id"": ""2"",
                            ""name"": ""Prod1"",
                            ""price"": ""200"",
                            ""image_url"": ""~/Images/prod2.jpg""
                            }
                        ]
                        }
                    }";
    return JsonConvert.DeserializeObject<Example>(json);           
}
OUPTUT

Example 2: Using JObject & JToken classes

Now let's assume we have below Json response where parent node for the product data is dynamic which is productid.

Json Response
{
  "response": {
    "status": 1,
    "httpStatus": 200,
    "products": {
      "1": {
        "id": "1",
        "name": "Product-1",
        "price": "100",
        "image_url": "~/Images/prod1.jpg"
      },
      "2": {
        "id": "2",
        "name": "Prod1",
        "price": "200",
        "image_url": "~/Images/prod2.jpg"
      }
    },
    "errors": [],
    "errorMessage": null
  }
}

In this case we would use JObject JToken to fetch the product data as we would not able to generate the static classes for this scenario as the parent node has dynamic values which would change on run-time.

static void Main(string[] args)
{
    List<product> products = new List<product>();
    products = getProductDetails();
    foreach (Product p in products)
    {
        Console.WriteLine(string.Format("Product Id: {0}", p.id));
        Console.WriteLine(string.Format("Product Name: {0}", p.name));
        Console.WriteLine(string.Format("Product Price: {0}", p.price));
        Console.WriteLine(string.Format("Product Image URL: {0}\n", p.image_url));
    }
    Console.Read();
}

public static List<product> getProductDetails()
{
    List<product> products = new List<product>();
    Product product = null;
    string json = @"{
                ""response"": {
                ""status"": 1,
                ""httpStatus"": 200,
                ""products"": {
                    ""1"": {
                        ""id"": ""1"",
                        ""name"": ""Product-1"",
                        ""price"": ""100"",
                        ""image_url"": ""~/Images/prod1.jpg""
       
                    },
                    ""2"": {
                        ""id"": ""2"",
                        ""name"": ""Prod1"",
                        ""price"": ""200"",
                        ""image_url"": ""~/Images/prod2.jpg""
                    }
                },
                ""errors"": [],
                ""errorMessage"": null
                }
            }";
    JObject data = JObject.Parse(json);
    JObject Products = (JObject)data["response"]["products"];
    foreach (var x in Products)
    {
        JToken prod = x.Value;
        product = new Product();
        product.id = prod["id"].ToString();
        product.name = prod["name"].ToString();
        product.price = prod["price"].ToString();
        product.image_url = prod["image_url"].ToString();
        products.Add(product);
    }
    return products;
}
OUTPUT

Mar 30, 2016

Derived Column Transformation in SSIS

Derived Column Transformation in SSIS is used to generate a new column by applying expression on input columns. An expression contains any combination of functions, variables, operators and Input Columns.

In one of our previous tutorial, Conditional Split in SSIS, we used an expression in condition where we identify the bank on the basis of first three characters of credit card column. In this post, we would use the same table and will generate a derived column Bank by applying condition and expression on Credit Card Column to identify the bank

Prerequisites
  • SQL Server with SSIS
  • SQL Server Data Tools
  • SQL Server Management Studio

If you already have exercised any of the articles from this blog
You would already have Project SSIS-Tutorials and Credit Card Details Table in your database. You can skip first 2 steps and start with 3rd.

Step 1: Create Credit Card Details Table in SQL Server Database

Run SQL Server Management Studio, connect to database and run below script to create Credit Card Detail Table

CREATE TABLE [dbo].[CreditCardDetails](
 [CustomerId] [varchar](50) NULL,
 [CreditCardNo] [varchar](50) NULL,
 [TansactionType] [char](2) NULL,
 [TransactionDate] [datetime] NULL,
 [Amount] [numeric](18, 2) NULL
) ON [PRIMARY]
GO
INSERT [dbo].[CreditCardDetails] ([CustomerId], [CreditCardNo], [TansactionType], [TransactionDate], [Amount]) VALUES 
('C00000001', 'SBI000000001', 'DR', '01/01/2016', 2500.00),
('C00000002', 'CAN000000001', 'DR', '01/01/2016', 2800.00),
('C00000001', 'SBI000000001', 'CR', '02/01/2016', 25.00),
('C00000003', 'SBI000000002', 'DR', '02/01/2016', 1485.00),
('C00000004', 'SBI000000003', 'DR', '03/01/2016', 2528.45),
('C00000002', 'CAN000000001', 'CR', '04/01/2016', 14.00),
('C00000003', 'SBI000000002', 'CR', '04/01/2016', 37.13),
('C00000004', 'SBI000000004', 'DR', '05/01/2016', 1000.00),
('C00000005', 'CAN000000002', 'DR', '05/01/2016', 3000.20)
Step 2: Run SQL Server Data Tools

Step 3: Add new package to the project. Name the package Derived-Column.


Add Package

Step 4: Add Data Flow Task to Control Flow Tab

Add Data Flow Task


  • Double Click Data Flow Task to switch to Data Flow Task Tab.

  • Step 5: Add and Configure OLE DB Source
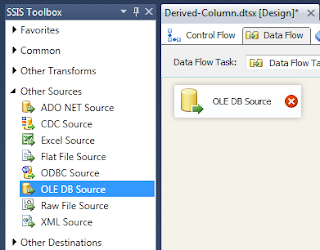
    • Drag and Drop OLE DB Source from SSIS Toolbox to Data Flow Task.

    Add OLE DB Source

    • Double Click OLE DB Source will open OLE DB Source Editor window.
    • Select the Shared Data Connection if not selected we created in Step 2.
    • Select Table CreditCardDetails.

    Configure OLE DB Source

    Step 6: Add and Configure Derived Column
    • Add Derived Column to Data Flow Task.
    • Connect OLE DB Source to Derived Column.

    Add Derived Column Transformation

    • Double Click Derived Column to open Conditional Split Transformation Editor.
    • Conditional Split Transformation Editor is divided into 3 sub windows.
      • Columns, variables and parameters are used in expression to generate derived column(s).
      • In-built functions are optionally used in expression like we are using LEFT function in the expression 
      • Derived Column: Here we configure derived column(s)
        • Derived Column Name: Name of the derived column that would be generate. It is similar to Alias Column in T-SQL.
        • Derived Column: You have two option here. Either generate column as a new column or replace the existing one. 
        • Expression: Here we write custom expression using columns,variable and in-built function to generate column
        • Data Type:  Data Type of the derivied column that would be generated
        • Length: Display Length of the derivied column for non-mumeric columns
        • Precision: Display precision if the data type of column is numeric
        • Scale: Display scale if the columns is decimal/float.

    • Let's add a derived column Bank Name as a new column, where we will identify bank on the basis of first three characters of Credit Card Column

    Configure Derived Column Transformation

    Step 7: At this step we are done with adding and configuring Derived Column. Now instead of exporting data to some destination we can preview the data with derived column on the run-time.
    • Add Conditional Split to the Data Flow Task
    • Connect Derived Column to Conditional Split

    Add Conditional Split

    • Right click Connector between Derived Column and Conditional Split and click Enable Data Viewer

     Add Data Viewer

    We are done with creating the package. Let's execute the package preview the data.

    Data Preview

    Look at the output. The derived column Bank Name is generated in Data View Window.

    Mar 22, 2016

    Data Conversion Transformation in SSIS

    Data Conversion Transformation in SSIS is used to covert the data type of a column. It is very important transformation and is frequently used in packages.

    For Example, in a package we import the data from various sources and the columns have X data type but the data type of destination columns have Y data type, in such cases we need Data Conversion Transformation.

    We place Data Conversion Transformation between Source and Destination so that it converts the data type of Source Columns to make it compatible with Destination Columns.

    Import File


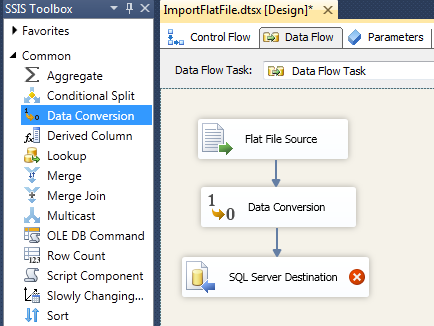
    Let's take a real life example where we will import a Flat file to SQL Server and we would require Data Conversion Transformation

    Import Flat File to SQL Server using SSIS

    In the above example, there are two columns Data and Amount which have incompatible data types and we have used Data Conversion Transformation to make them compatible.

    Mar 10, 2016

    Conditional Split Transformation in SSIS

    In this article, you will learn about Conditional Split Transformation in SSIS with an example.

    Conditional Split is used to divide the flow of data to more than one destination depending on the condition(s).

    Example
    We have a table in SQL Server Database which stores Credit Card Details and we will fetch the data and on the basis of Credit Card No. will find out the the Bank of the transaction and will export the credit card details into flat files for each bank separately.

    Prerequisites
    • SQL Server with SSIS
    • SQL Server Data Tools
    • SQL Server Management Studio

    If you have already exercised any of the below articles from this blog,
    You would already have Project SSIS-Tutorials and Credit Card Details Table in your database. You can skip first 2 steps and start with 3rd..

    Step 1: Create Credit Card Details Table in SQL Server Database

    Run SQL Server Management Studio, connect to database and run below script to create Credit Card Detail Table
    CREATE TABLE [dbo].[CreditCardDetails](
     [CustomerId] [varchar](50) NULL,
     [CreditCardNo] [varchar](50) NULL,
     [TansactionType] [char](2) NULL,
     [TransactionDate] [datetime] NULL,
     [Amount] [numeric](18, 2) NULL
    ) ON [PRIMARY]
    GO
    INSERT [dbo].[CreditCardDetails] ([CustomerId], [CreditCardNo], [TansactionType], [TransactionDate], [Amount]) VALUES 
    ('C00000001', 'SBI000000001', 'DR', '01/01/2016', 2500.00),
    ('C00000002', 'CAN000000001', 'DR', '01/01/2016', 2800.00),
    ('C00000001', 'SBI000000001', 'CR', '02/01/2016', 25.00),
    ('C00000003', 'SBI000000002', 'DR', '02/01/2016', 1485.00),
    ('C00000004', 'SBI000000003', 'DR', '03/01/2016', 2528.45),
    ('C00000002', 'CAN000000001', 'CR', '04/01/2016', 14.00),
    ('C00000003', 'SBI000000002', 'CR', '04/01/2016', 37.13),
    ('C00000004', 'SBI000000004', 'DR', '05/01/2016', 1000.00),
    ('C00000005', 'CAN000000002', 'DR', '05/01/2016', 3000.20)
    

    Step 2: Run SQL Server Data Tools
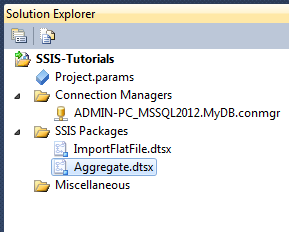
    If already created in previous tutorial(s), open the existing project SSIS-Tutorials.

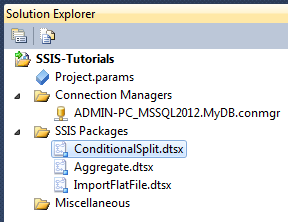
    Step 3: Add new package to the project. Name the package ConditionalSplit.

    Add New Package

    Step 4: Add Data Flow Task to Control Flow Tab

    Data Flow Task

    • Double Click Data Flow Task to switch to Data Flow Task Tab.

    Step 5: Add and Configure OLE DB Source
    • Drag and Drop OLE DB Source from SSIS Toolbox to Data Flow Task.
    Configure OLE DB Source
    • Double Click OLE DB Source will open OLE DB Source Editor window.
    • Select the Shared Data Connection if not selected we created in Step 2.
    • Select Table CreditCardDetails.

    Configure OLE DB Source

    Step 6: Add and Configure Conditional Split
    • Add Conditional Split to Data Flow Task.
    • Connect OLE DB Source to Conditional Split.

    Add Conditional Split

    • Double Click Conditional Split to open Conditional Split Transformation Editor.
    • Conditional Split Transformation Editor is divided into 3 sub windows.
      1. Columns, variables and parameters are used in expression to split the flow of data. Here we are using CreditCard Column in our example
      2. In-built functions are optionally used in expression like we are using LEFT function in the expression 
      3. Condition(s) that define how to split the flow of data. In our example we have two conditions where using LEFT function on CreditCard column we are identifying different banks and accordingly splitting the flow of data in different path. You can add more conditions to split more data flow.
    Configure Conditional Split

    Step 7: Add and Configure Flat File Destination(s)
    • Add two Flat File destinations and name them SBI & Canara Bank respectively.
    • Connect Conditional Split to SBI - Flat File Destination. This will open Input Output Selection window. Select SBI in the Output Drop-down-list and click OK

    Add Flat File Destination

    • Double Click SBI - Flat File Destination to open Flat File Destination Editor.
    • Click New will open Flat File Format window. Delimited will be selected by default

    Configure Flat File Destination

    • Click OK will close the Flat File Window and will open Flat File Connection Manager Editor window. Click browse to set the Destination Path of the Flat File. Set the File Name as SBI and click Open.

    Browse File Path

    • Click OK to close the Flat File  Connection Manager Editor window.
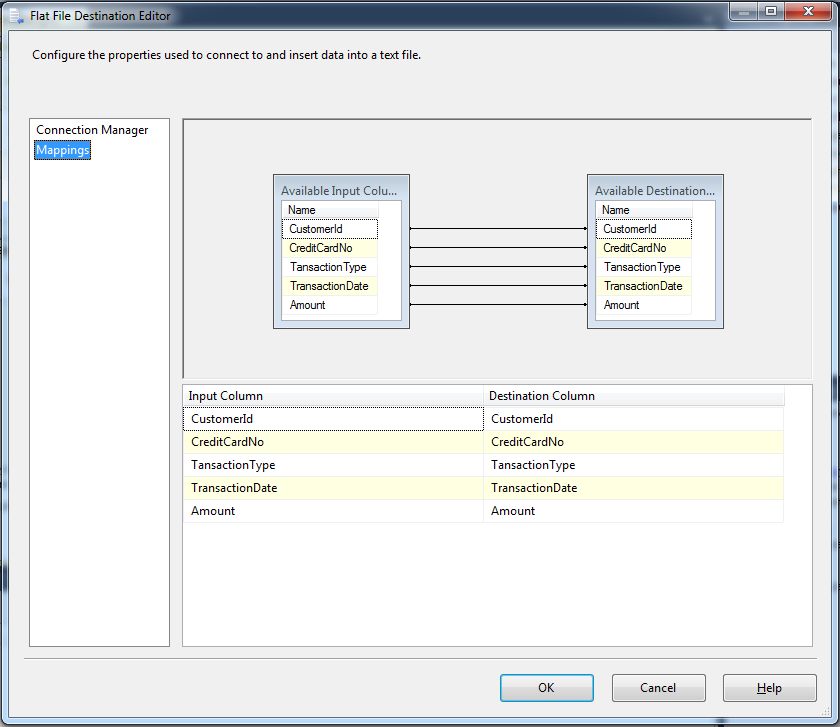
    • On Flat File Destination Editor switch to Mapping Tab. Input Column will be auto mapped with Destination Column. In case not, configure mapping like below and click OK

    Configure Mapping

    • Repeat the Steps for Canara - Flat File Destination similar to what we have performed for SBI - Flat File Destination. Select Canara as Output and file name
    • In Flat File Manager Editor, Flat file Connection Manager will be selected  which we created for SBI - Flat File Destination. Click on New to create New Flat File Connection for Canara - Flat File Destination.

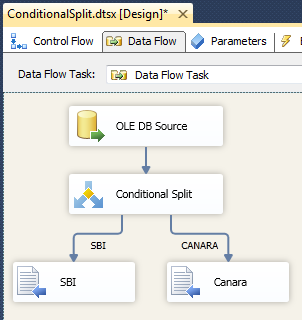
    At this stage we are done with creating the package. Package looks like below

    Package

    Now let's execute the package.

    Package Execution

    Package execute successfully. You can clearly view in the execution flow, 9 rows imported from the table and conditional split transformation divided the flow of data to 6 and 3 rows on different paths depending on condition.

    Now let's browse the path and check the files and data

    File Output

    Mar 5, 2016

    Aggregate Transformation in SSIS

    In this tutorial, you will learn about Aggregate Transformation in SSIS with an Example.

    Aggregate Transformation is used in Data Flow Task to aggregate the data like Sum, Max, Min, Avg etc.

    Example
    We have a Table in SQL Server Database which stores Employees Salary. We will first create an OLE DB Connection to fetch the data from the database and will perform Aggregate Transformation on the data to calculate Sum, Max & Min salary for each department and Aggregated data will be then exported to a Flat file with pipe {|} delimiter.

    Prerequisites
    • SQL Server with SSIS
    • SQL Server Data Tools
    • SQL Server Management Studio

    Step 1: Run SQL Server Management Studio, connect to database and run below script to create Employee Salary Table with some data
    create table EmpSalary(
        EmpId  char(6),
        DeptId int,
        Salary numeric(18,2)
    )
    insert into EmpSalary values
    ('EMP001',1,50000),
    ('EMP002',2,40000),
    ('EMP003',2,25000),
    ('EMP004',2,20000),
    ('EMP005',3,30000),
    ('EMP006',3,13000),
    ('EMP007',4,23000),
    ('EMP008',5,17000)

    Step 2: Run SQL Server Data Tools
    If already created in previous tutorial(s), open the existing project SSIS-Tutorials.

    Step 3: Add new package to the project. Name the package Aggregate.

    New Package

    Step 4: Add Data Flow Task to Control Flow Tab

    Data Flow Task

    • Double Click Data Flow Task to switch to Data Flow Task Tab.

    Step 5: Add and Configure OLE DB Source
    • Add OLE DB Source.
    OLE DB Source

    • Double Click OLE DB Source will open OLE DB Source Editor window.
    • Select the Shared Data Connection if not selected we created in Step 2.
    • Select Table EmpSalary.

    OLE DB Source Editor

    Step 6: Add and Configure Aggregate Transformation
    • Add Aggregate to Data Flow Task.
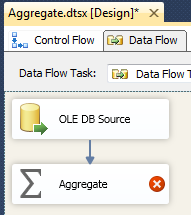
    • Connect OLE DB Source to Aggregate.

    Add Aggregate Transformation

    • Double Click Aggregate to open Aggregate Transformation Editor and configure the columns like below to find Sum, Max & Min of Salary Department-wise.

    Configure Aggregate Transformation

    Step 7: Add and Configure Flat File Destination
    • Add Flat File Destination.
    • Connect Aggregate to Flat File Destination.

    Add Flat File Destination

    • Double Click Flat File Destination to open Flat File Destination Editor.
    • Click New to open a Flat File Format window.

    Flat File Destination Editor

    • Click OK to open Flat File Connection Manager Editor.
    • Click Browse to configure the Flat File Path and Name. Browse the path and name DeptWiseSalary in the File Name. File will be automatically created.

    Flat File Connection Manager Editor

    • Click Open to close the Browser window
    • In Flat File Connection Manager Editor tick the check-box Column names in the first data row to export the column names otherwise data will be exported without the column names

    Flat File Connection Manager Editor

    • Switch to Columns Tab on Flat File Connection Manager Editor.
    • Select Vertical Bar {|} as Column Delimiter.

    Flat File Connection Manager Editor

    • Click OK to close Flat File Connection Manager Editor.
    • Switch to Mappings Tab on Flat File Destination Editor and configure like below.

    Mapping

    • Click OK to close Flat File Destination Editor

    At this step we are done with creating the package. Let's execute the package.


    Execute Package

    Package executed successfully. Now let's browse the Flat File Path and check if file is created.

    File Path

    Now let's Open the File and check if data is exported.

    Output

    Contactmeasap