In this post, we will see how to create a Shared Data Source in SSRS.
Data Source contain the information necessary to retrieve the data from the relational database to render the reports. If a data source is not shared, it is stored inside a report and can not be used by other reports.
In general, we need to have a data source that can be used in all the reports in the same project. Such data sources are called as shared data source.
Now let's walk through how to create a shared data source
Prerequisites
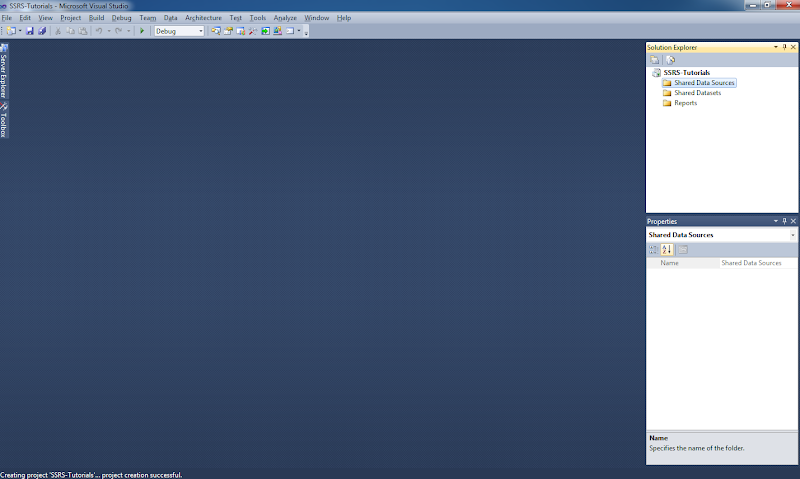
Step 1: Open SQL Server Data Tools and create a new Project Business Intelligence > Report Server Project and name it as SSRS-Tutorials
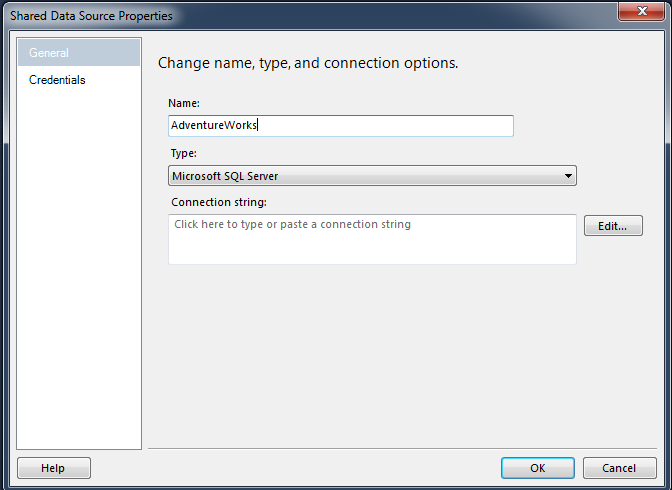
Step 2: Right Click Shared Data Source, then Add New Data Source. A new pop pup window will appear to configure Data Source Properties. Change the name of Data Source to AdventureWorks
Step 3: Click on Edit, a new pop up window will appear to configure Connection Properties like Server Name, Authentication and Database
Step 4: Click OK twice to close the popup windows and Shared Data Source AdventureWorks is created.
Data Source contain the information necessary to retrieve the data from the relational database to render the reports. If a data source is not shared, it is stored inside a report and can not be used by other reports.
In general, we need to have a data source that can be used in all the reports in the same project. Such data sources are called as shared data source.
Now let's walk through how to create a shared data source
Prerequisites
- SQL Server 2012 with Reporting Services
- AdventureWorks Database
NOTE: We would be using AdventureWorks Sample Database which is shipped with SQL Server 2012 Enterprise Edition. If you have Express Edition you have to download it. Download here.
Step 1: Open SQL Server Data Tools and create a new Project Business Intelligence > Report Server Project and name it as SSRS-Tutorials
Step 2: Right Click Shared Data Source, then Add New Data Source. A new pop pup window will appear to configure Data Source Properties. Change the name of Data Source to AdventureWorks
Step 3: Click on Edit, a new pop up window will appear to configure Connection Properties like Server Name, Authentication and Database
Step 4: Click OK twice to close the popup windows and Shared Data Source AdventureWorks is created.


No comments:
Write Comments